Nasa ParaWing
thumb

send me a mail mail


nose and darts
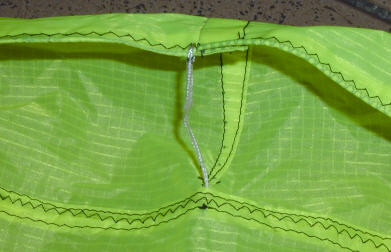
The famous Nas ParaWing shape is achieved by "bending the nose" thanks to darts 
equally positioned on top of sail.

 
  • There are 6 darts on top of the kite
    • 2 darts are on the upper tip of each wing
    • 4 darts are on the nose
    • darts measurements and positions are provided into the excel spreadsheetl
    • copy layout of darts on the fabric


  • darts are folded on their middle inside the wing (dashed line)
  • they are then flattened and sewn on their three edges
Here is the result for a dart on the left wing side
  • to look at the picture :
    • dart is the triangle around the 1 figure
    • arrow is pointing to the top of kite
    • wing is seen from backside (we don't see the dart but its sewing)
    • "T" n°6 attachement is visible
    • notice the "bend" induced by the dart on top of the picture 
and here is one of the four darts on the nose (seen from inside the kite)
  • notice that the "T" has been attached to the nose
  • notice (and it is important) that the dart tip is at the same place than bottom of  T3 on sail body.
to fasten the "T" on nose top
 
  • write, with a pen, a point at the exact finished measure of the "T".
  • poke a hole on the nose behind reinforcemnt cord. Use a "tool" made of a piece of iron (roughly 0.5 mm diameter) placed on a piece of wood.
  • hot this tool, and use it to "burn" a hole inside the sail.
  • a strong recommendation is to first try this tool on a scrap part of fabric!!!l 
  • use the inside loop technics to fasten the nose.

  •  
  • attach  T n° 1 and 6
  • first on the sail just in between  wing and body.
  • then fasten "T"s on the nose.


on picture you can see

  • "T" n°1 with its two 'inside loops' 
  • bridling line L1 fastened to bridling point A1. But this is the purpose of "bridling" page !
Here is what you will get once the nose finished (and sail in flight !!!)
  • You can see precisely the bended shape of nose
  • notice the 4 darts on the nose.