Nasa ParaWing
thumb

send me a mail mail


wing bridling
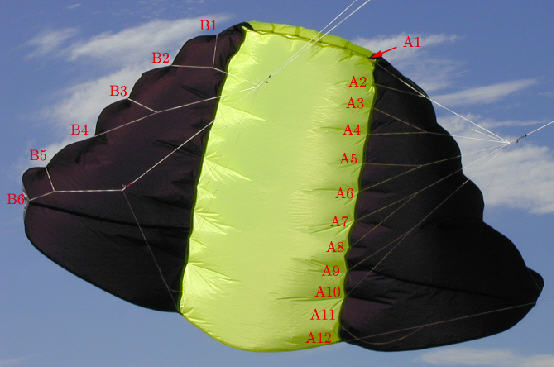
This is a rather easy but rather annoying part of NPW building...
However bridling must be done precisely, as the inflight behaviour of this kite is strongly affected by bridling accuracy.
Whatever bridling solution you choose (regular or cascade), the bridling points are exactly the same.
  • there are 12 bridling point on each side of the main body.
    • points A1 to A12 are regularly spaced  
    • A1 point is located at the tip of nose 
    • A12 point is on bottom of main body
  • there are 6 points on each wing edge
    • B1 à B6 points are regularly spaced 

    • B6 point is located at the tip of the wing
    • begin by positionning B6 and go up to B1
  • thanks to NOT look at too closely to the wing shape on the right picture. There was almost no wind when it was taken and the brakes were released....

cascade bridling

It is the bridling technics used for my kite.
This idea of this "new bridling" is not mine...It a  Bill Painter's one. 
I am not sure that Bill was the first to "cascade bridle" a NPW, 
but he was for sure the first one who explained it on internet !!!
Have a look to his site it worths the visit !
cascade bridling is composed of two stages of bridles :
  • primary bridling is directly linked to flying lines
  • secondary bridling is linked to the kite
Nasa ParaWing is ideally flewn with four flying lines
  • two main lines (red on the drawing)
  • two brakes lines (blue on the drawing)
Brakes are fastened to 
  • A11 and A12
  • B5 and B6
There are other brakes configurations but this one is the most frequently used and probably the most efficient too. 
Bridles measurements are provided into excel spreadsheet  "calculations" page cells C14 to C34

You can notice that most of bridles are "double". We can thus make bridling, two bridles at a time (using the same cord for two bridles).
You get then the array on right side (excel spreadsheet "bridals" page cells EF 39 to 50).

  • first column : cord length for two bridles (without margins for nodes)
  • second column : fastening point for primary bridle.
  • We can do the same for all secondary bridles
  • We can also do the same for primary bridles excepted A1 and A2 primary bridle.


cascade bridling tips

bridling is performed like this
  • poke two holes with  hot tool (one on each side of the cord) for all A points.
  • poke a hole with hot tool behind the cord for eaxh B point.
Fasten all secondary bridles
  • fasten with a slip node (or with an inside loop) the first side of the bridle
  • measure precisely the fastening point to primary bridle and mark it onthe cord
  • measure the total lenght of the bridle and mark it on the cord
  • add 10 cm  marging to allow the second node
  • fasten bridle to the required position
be accurate enough when do the bridling...
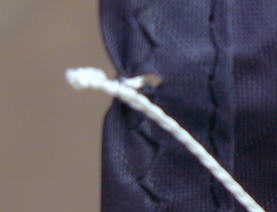
Fasten all primary bridles
  • cut all at once the primary bridles (kep enough margin to fasten them to secondaries)
  • fasten the center of all primaries to a piece of strong cord (1mm diameter at least)use a  lark node and an inside loop (put a drop of cyano-acrylate glue at the red arrow position)
  • mark the position where you will fasten the primary on the secondaries (all the primaries at once)
  • fasten one by one the primary bridles to the secondary one. Use a lark node put a drop of glue on it.
  • as soon as one primary line is fully finsihed fasten it on a "T" to avoid "mixing" the bridles and so win many many time...)


handles and flying lines

  • flying lines are fastened to the primaries with a lark node.
  • flyong lines are connected to handles and handles to harness.
  • Handles and harness bar are made of strong aluminium or "PVC" pipe
    • on left side if picture is an handle
    • on right side is the harness bar
    • notice the cord connected to the harness bar and then tothe harness itself
  • It is important to protect the cord inside the handles.
    • carefully "round" the holes
    • put a second cord outside the first one to protect it
    • a drop of glue prevents the cord from slipping

your Nasa ParaWing is ready ... to fly !